Installation and Configuration
Course Reading
Learning objectives
- Download installation and configuration tools
- Install a Kubernetes master and grow cluster
- Configure network for secure communication
- High-availability deployment considerations
Installation tools
There are many ways to get up an running with Kubernetes.
If you want to get started without needing to install and configure the cluster yourself, a managed cloud provider solution is a good option. Google offers Google Kubernetes Engine (GKE) and AWS offers Elastic Kubernetes Service (EKS) which gives users more control of cp nodes.
Another simple way to get up and running is with Minikube which is a single binary that runs in a VirtualBox VM. This is a great tool to use as a learning and testing environment even though it is just a single node.
Canonical has also developed a tool called MicroK8s which aims to make installation easy. This is great for running Kubernetes at the edge or on IoT devices. Runs on Ubuntu 16.04 and later.
This course focuses on using kubeadm which is the suggested community tool by the Kubernetes project for setting up a cluster. Getting the cluster set up with kubeadm only requires two commands, kubeadm init on the cp node and kubeadm join on any worker nodes or additional cp nodes, and the cluster bootstraps itself.
To actually use the cluster the kubectl command is used. This run locally on your machine and communicated with the cluster API endpoint. kubectl can control all Kubernetes resources to create, manage, and delete.
There are also other mechanisms to create a Kubernetes cluster, like kubespray and kops.
Installing kubectl
The recommended way to configure and manage your Kubernetes cluster is kubectl. Most distros have kubectl available in their repositories, or you can download the code from Github and compile and install from the source code.
The command stores its configuration in $HOME/.kube/config, which contains information for all the K8s endpoints you might use. In it are cluster definitions (IP endpoints), credentials, and contexts. The contexts is a combination of cluster and user credentials, which can be passed in the command line or the context can be switched with
kubectl config use-context foobar
which is helpful for switching between local environments to a cluster in the cloud.
Using Google Kubernetes Engine (GKE)
Requirements:
- A Google Cloud account
- Payment method for any services used
gcloudcommand line client.
Instructions for installing gcloud can be found here.
The GKE quick start guide can be found here.
Then to create your first cluster in GKE:
gcloud container clusters create linuxfoundation

gcloud container clusters list

kubectl get nodes
The first command creates the cluster with the name linuxfoundation. The next command lists the cluster. The final command lists the nodes of the cluster. Installing gcloud automatically installs kubectl as well.
Once done with the cluster, delete it or you will be charged.
gcloud container clusters delete linuxfoundation
Using minikube
Minikube is a project under the Kubernetes organization on Github.
To download and install the latest version of minikube run
curl -Lo minikube https://storage.googleapis.com/minikube/releases/latest/minikube-darwin-amd64

chmod +x minikube

sudo mv minikube /usr/local/bin
Once minikube is installed, the Kubernetes can be started with
minikube start

kubectl get nodes
The first command will start a VirtualBox VM running a single node Kubernetes deployment and the Docker engine. Internally, minikube is running a single Golang binary, localkube, which runs all the components on Kubernetes together, which makes minikube much simpler than a full Kubernetes deployment.
Installing with kubeadm
Currently, the most straightforward method of building a full Kubernetes cluster is kubeadm which was first introduced in v1.4.0 and moved from beta to stable with added functionality for high availability in v1.15.0.
Official documentation for setting up a cluster with kubeadm can be found here.
To setup a cluster:
- Run
kubeadm initon head node - Create network for IP-per-Pod criteria
- Run
kubeadm joinon workers or secondary cp nodes.
Joining other nodes to the cluster will require at least a token and a SHA256 hash, which is returned by the kubeadm init. kubectl can also be used to create the network using a resource manifest.
An example, using the Weave network:
kubectl create -f https://git.io/weave-kube
Once the steps are complete and the workers and secondary cp nodes have joined, there will be an operational multi-node Kubernetes cluster and you can interact with it using kubectl.
kubeadm-upgrade
Building the cluster with kubeadm gives the option to upgrade using kubeadm upgrade. Most users will try to stay on the same version for as long as possible, but this tool allows a path for regular upgrades for security.
Some of the command for kubeadm upgrade:
planchecks the installed version against the newest version to verify upgradeabilityapplyupgrades the first cp node to the version specifieddiffshows the differences applied in an upgrade. It is similar toapply --dry-run.nodelets local kubelet configuration to be updated on the worker nodes, or secondary cp nodes. Also calls aphasecommand to step through upgrading.
In general, the process for upgrading is:
- Update software
- Check version
- Drain cp
- View planned upgrade
- Apply upgrade
- Uncordon the cp and allow pods to be scheduled
More in-depth documentation about the upgrade process can be found in the official documentation here.
Installing a Pod network
Prior to initialization of a cluster, a network needs to be considered and IP conflicts avoided. There are many options for Pod networking. Many projects mention Container Network Interface (or CNI, another CNCF project) as a way to handle deployments and cleaning up network resources.
Calico
A flat layer 3 network that communicates without IP encapsulation. It is used in production with many orchestration tools. It has a simple and flexible networking model and scales well to large environments. Canal is another option, that is part of the same project, which can integrate with Flannel. Calico also allows implementing network policies.
Flannel
A layer 3 IPv4 network between cluster nodes. It has a long history with Kubernetes as it as developed by CoreOS. Flannel focuses on traffic between hosts, not the local container configuration for networking. flanneld agents sit on each node to allocate subnet leases to the host. It can be configured after deployment but it is easier before Pods are added.
Kube-Router
A single binary that "does it all". It is in alpha but promises distributed load balancer, firewall, and router purpose built for K8s.
Romana
This project is aimed towards automating network and security in cloud native applications. Romana is aimed at large clusters, IPAM-aware topology and integrates with kops clusters.
Weave Net
Usually used as an add-on for CNI enabled clusters.
More installation tools
Kubernetes is like any other application you would install on a server so the the usual configuration management tools (Terraform, Ansible, Chef, Puppet, etc.) can be used for installation.
The best way to learn about installing Kubernetes manually is with Kelsey Hightower's Kubernetes the Hard Way.
kubespray
kubespray is a Kubernetes incubator project. It is an advanced ansible playbook that can set up a cluster on different OSes with different network providers. It was formerly known as kargo.
kops
kops (short for Kubernetes Operations) allows for single command line creation of K8s cluster on AWS. Creation on GKE is in beta and VMWare is in alpha.
kube-aws
A command line tool for creating Kubernetes clusters on AWS using CloudFormation. This tool has been retired and has reached end of life.
kubicorn
kubicorn leverages kubeadm to build clusters. It has no DNS dependency, runs on multiple OSes, and uses snapshots to capture clusters and move them.
Installation considerations
Before installing a full cluster, it is good to experiment with a single node cluster, like the one minikube provides.
Once ready to deploy a cluster of servers there are a some decision points
- What provider? Public or private cloud? Virtual or physical servers?
- What operating system? Kubernetes runs on most Linux distros.
- What networking solution? Is an overlay needed?
- High availability for the head nodes?
To choose the best option, the Kubernetes Getting Started docs are a good resource.
In most cases the Kubernetes components will run as systemd unit files as that has become the dominant init system for Linux OSes. They could also be run by a kubelet on the head node (kubeadm).
Main deployment configurations
There are four main deployment configurations.
- Single node - all components run on the same server, Good for testing and development, not well suited for production.
- Single head node, multiple workers - Typically has an etcd instance running on the head node with the API, scheduler, and controller-manager.
- Multiple head nodes with HA, multiple workers - This type of configuration adds more durability to the cluster. The API server is fronted by a load balancer, scheduler and controller-manager elect a leader (configured by flags). etcd can still run as a single node.
- HA etcd, HA head nodes, multiple workers - This is the most advanced and robust Kubernetes setup. etcd would also run as a true cluster on nodes separate from th head nodes.
A tool called Kubernetes Federation also offers high availability. It joins multiple clusters together with a common cp to let resources move between clusters administratively or due to failure. It has some issues but there is hope v2 will be a better product.
systemd unit file for Kubernetes
In any of the mentioned configurations, some components will run as standard system daemons. Here is an example of a (by no means perfect) systemd unit file for the controller-manager:
- name: kube-controller-manager.service
    command: start
    content: |
      [Unit]
      Description=Kubernetes Controller Manager Documentation=https://github.com/kubernetes/...
      Requires=kube-apiserver.service
      After=kube-apiserver.service
      [Service]
      ExecStartPre=/usr/bin/curl -L -o /opt/bin/kube-controller-manager -z /opt/bin/kube-controller-manager https://storage.googleapis.com...
      ExecStartPre=/usr/bin/chmod +x /opt/bin/kube-controller-manager
      ExecStart=/opt/bin/kube-controller-manager \
        --service-account-private-key-file=/opt/bin/kube-serviceaccount.key \
        --root-ca-file=/var/run/kubernetes/apiserver.crt \
        --cp=127.0.0.1:8080 \
...
Familiarity with the configuration of each components and the options available come with more practice. Expect the option to change as Kubernetes continues to rapidly develop.
An example, the API serve is a highly configurable component. Here's the documentation for configuring it.
Using Hyperkube
Instead of system deamons, the API server, scheduler, and controller-manager can be run as containers. This is how kubeadm runs them. Similar to minikube, hyperkube runs as an all in one binary which Google hosts as a container (this may require adding a new repository so Docker can find and download the image).
Using hyperkube runs a kubelet as a system daemon and then reads manifests for instructions on how to run the other components. Running hyperkube is also a good way to begin learning the different configuration flags of the components that form the cp. You can get more information on these flags by downloading the image and running the help commands:
docker run --rm gcr.io/google_containers/hyperkube:v1.16.7 /hyperkube kube-apiserver --help

docker run --rm gcr.io/google_containers/hyperkube:v1.16.7 /hyperkube kube-scheduler --help

docker run --rm gcr.io/google_containers/hyperkube:v1.16.7 /hyperkube kube-controller-manager --help
Compiling from source
Apart from these useful tool, Kubernetes can also be compiled from source by cloning the repository and building the binaries. Building can be done natively with Golang or via Docker containers.
To build via Golang, first install it. Then clone the kubernetes repo and run the make command:
cd $GOPATH
git clone https://github.com/kubernetes/kubernetes
cd kubernetes
make
For building with Docker, instead of make run make quick-release.
The built binaries will be in the __output/bin directory.
Lab Exercises
Lab 3.1 - Install Kubernetes
- SSH into master node
ssh -i <PEM key name> <user>@<IP address>
wgetthe course materials.
important
Check the course material page before running to make sure you are downloading the latest tarball
wget https://training.linuxfoundation.org/cm/LFS258/LFS258_V2021-09-20_SOLUTIONS.tar.xz \
    --user=LFtraining --password=Penguin2014

tar -xvf LFS258_V2021-09-20_SOLUTIONS.tar.xz
- Become root and update/upgrade the system.
sudo -i

apt-get update && apt-get upgrade -y
The -y flag will accept all prompt to make the upgrade go faster so you are not prompted for every package upgrade.
- Install an editor,
nano,vim, andemacsall work well. The labs are designed to usevim
apt-get install -y vim
- Install container runtime. The course suggests Docker, as that is the default runtime when building with
kubeadmon Ubuntu at the moment. For an added challenge (maybe try these labs again with this option?) you could use cri-o, but at the moment that takes multiple steps.
apt-get install -y docker.io
- Add a new repo for Kubernetes. Create the file and add an entry for the main repo for the distro we are using (Ubuntu in my case). Even though we are using Ubuntu 18.04, we'll use the
kubernetes-xenialrepo. Also include the keywordmainNote there are four sections to the entry.
Creating the file:
vim /etc/apt/sources.list.d/kubernetes.list
The entry should look like:
deb http://apt.kubernetes.io/ kubernetes-xenial main
- Add a GPG key for the packages
curl -s https://packages.cloud.google.com/apt/doc/apt-key.gpg | apt-key add -
- Update the system again, with the new repo declared to download the latest repo information.
apt-get update
- Install the software. New versions release regularly but there are often bugs. To use the latest, omit the
=<version>from the following commands. Because of this we will install the most recent stable versions. In a later lab, the cluster will be upgraded to a newer version.
apt-get install -y kubeadm=1.21.1-00 kubelet=1.21.1-00 kubectl=1.21.1-00

apt-mark hold kubelet kubeadm kubectl
- Decide on a pod network. As discussed previously, this should take into account the anticipated demands on the cluster. There can only be one pod network per cluster, although there is a project, CNI-genie that is trying to change that.
The network needs to allow container-to-container, pod-to-pod, pod-to-service, and external-to-service communication. Docker uses host-private networking (docker0 virtual bridge and veth interfaces) which requires being on the host to communicate.
For this we will use Calico as the network plugin to use Network Policies later in the course. Calico does not deploy using the CNI by default at the moment. Once downloaded, we need to look for the expected IPv4 range the containers will use in the configuration file.
wget https://docs.projectcalico.org/manifests/calico.yaml
- With the manifest downloaded, look through it for the IPv4 pool assigned to the containers (the
lessorcatcommands are good for this). Also take a moment while paging through to look at some of the other settings. TheCALICO_IPV4POOL_CIDRmust match the pool given tokubeadm init.
cat calico.yaml

- Find the IP address for the primary interface of the cp server. There are two ways to do this:
hostname -i
or
ip addr show
- Add a local DNS alias for the cp server by editing the /etc/hosts file and adding an entry for the IP we found in the last step with the alias
k8scp.
vim /etc/hosts
- Create a configuration file for the cluster. For Docker, we need to configure the cp endpoint, software version, and podSubnet values. For cri-o there are many more things needed in the configuration.
vim kubeadm-config.yaml
In the config file should be this:
apiVersion: kubeadm.k8s.io/v1beta2
kind: ClusterConfiguration
kubernetesVersion: 1.21.1           #<-- Use the word stable for newest version
controlPlaneEndpoint: "k8scp:6443"  #<-- Use the node alias not the IP
networking:
  podSubnet: 192.168.0.0/16         #<-- Match the IP range from the Calico config file
- Initialize the cp. This output is likely to change as the software continues to mature. It will also give you a token to use to join worker nodes later, this can be retrieved again using
kubeadm token list. You will also be asked to configure a pod network, and the Calico configuration file will be passed for this.
kubeadm init --config=kubeadm-config.yaml --upload-certs | tee kubeadm-init.out
Once the cp is initialize, there are commands to run not as root. To exit as the root user run
exit
Then run the following commands:
mkdir -p $HOME/.kube

sudo cp -i /etc/kubernetes/admin.conf $HOME/.kube/config

sudo chown $(id -u):$(id -g) $HOME/.kube/config

less .kube/config
- Apply the network plugin
sudo cp /root/calico.yaml .

kubectl apply -f calico.yaml
- We'll next install the autocompletion to make working with
kubectla little easier.
sudo apt-get install bash-completion -y
Then restart the terminal session and do the following:
source <(kubectl completion bash)

echo "source <(kubectl completion bash)" >> $HOME/.bashrc
Test the autocomplete installation worked using tab as you type to autocomplete the command.
View the config values that we could have used in the
kubeadm-config.yaml.
sudo kubeadm config print init-defaults
Lab 3.2 - Grow the cluster
SSH into the worker node and use the same process as the cp node to get all the software installed on the worker node. This is steps 1 and 3-9 in the previous section.
Find your IP address for the cp node. Reminder that you can do this again with
hostname -i.Next we want to join the cp node and the worker. Remember that the join command is printed in the console but this command only works for 2 hours until it expires, so in the future we will need to generate our own. To do this:
sudo kubeadm token create
And then to list the token run:
sudo kubeadm token list
- Create a Discovery Token CA Cert Hash on the cp to make sure there is a secure connection between it and the worker node.
openssl x509 -pubkey \
    -in /etc/kubernetes/pki/ca.crt | openssl rsa \
    -pubin -outform der 2>/dev/null | openssl dgst \
    -sha256 -hex | sed's/ˆ.* //'
- On the worker node add a hostname alias for the cp name like we did originally on the cp node in the previous lab, with the alias
k8scp.
vim /etc/hosts
- Next we can join the worker/second node to the cp. We will use the token and the hash (a
sha256) to join them. Thekube initwould have an example of this to use if within 2 hours of running the command. Otherwise, we would build the command from the token and hash we just created. We'll also use the hostname alias we setup and port6443.
kubeadm join \
    --token <token> \
    k8scp:6443 \
    --discovery-token-ca-cert-hash sha256:<hash>
You can check this worked by running
kubectl get nodes
on the cp node.
- Now exit root on the worker node and try to run kubectl to get the nodes. It should fail because there is no local configuration to access the cluster.
exit
kubectl get nodes
ls -l .kube
The second like should fail due to the lack of configuration and the 3rd should fail due to the file not existing.
Lab 3.3 - Finish cluster setup
- View available nodes of the cluster. On the cp node run
kubectl get nodes
- Look at the details on the cp node. Notice that
Taints. The cp does not run non-infrastructure pods by default for security and resource contention.
kubectl describe node k8scp
- Enable non-infrastructure pods to run. For training we allow usage of the node but this can be skipped when setting up for a production environment.
kubectl describe node | grep -i taint

kubectl taint nodes --all node-role.kubernetes.io/master-
- Determine if the DNS and Calico pods are ready for use.
kubectl get pods --all-namespaces
If the CoreDNS pods seem to be getting stuck you may need to delete them to force them to be recreated.
kubectl -n kube-system delete coredns-<instance> coredns-<instance>
- Once this finishes, run
ip a
and you should see a new tunnel interface, tunl0, and more new interfaces as other pods are deployed.
Lab 3.4 - Deploy a simple application
- Create a new
deployment, which deploys a new container running an application and verify it is running.
kubectl create deployment nginx --image=nginx
kubectl get deployments
- View the details of the deployment
kubectl describe deployment nginx
- View the basic steps the cluster made to create the deployment
kubectl get events
- Get the description of the deployment in YAML format and notice, about halfway down in the output is the current status of the deployment.
kubectl get deployment nginx -o yaml
- Run the command but pipe the output to a file. Then edit the file and remove
creationTimestamp,resourceVersion, anduidsections. Also remove everything fromstatusdown.
kubectl get deployment nginx -o yaml > first.yaml

vim first.yaml
- Delete the existing deployment
kubectl delete deployment nginx
- Recreate the deployment, this time with our edited YAML file.
kubectl create -f first.yaml
- Get the output of this deployment and compare it to the first.
kubectl get deployment nginx -o yaml > second.yaml

diff first.yaml second.yaml
- Now we will learn some ways to get useful YAML and JSON output. The first is by "creating" a deployment but use the
--dry-runflag to just see the deployment spec. It should look very similar to the ones modified in previous steps. Also verify that no deployment was actually created by getting the deployment and verifying only the originalnginxdeployment is there.
kubectl create deployment two --image=nginx --dry-run=client -o yaml
kubectl get deployment
We can also get the YAML for an existing deployment as seen in previous steps.
kubectl get deployments nginx -o yaml
We can also output to JSON.
kubectl get deployments nginx -o json
- Now back to our
nginxdeployment. To be able to talk to the web server from external points of the cluster we need to create aservice. First look at the help page for theexposecommand. Notice some of the examples in the help field.
kubectl expose -h
Try to gain access to the server but notice it will fail since a port was not given.
kubectl expose deployment/nginx
- Now update the deployment container spec in the YAML file with the port information.
vim first.yaml
and add the following fields under the spec.template.spec.containers section of the file.
ports:
- containerPort: 80
  protocol: TCP
There are a few subcommands that will update the configuration. apply, edit, and path all do it non-disruptively.
apply does a 3-way diff on the previous, current, and supplied input to determine what changes to make. Fields that are not mentioned will not be touched.
edit gets the current configuration, opens an editor, and then runs an apply on the made changes.
patch can be used to update API objects in place.
For changes that cannot be made once te object is initialized, replace can be used which will destroy the object and recreate it. For the nginx deployment we must do this.
kubectl replace -f first.yaml
Then check to make sure the deployment and pod status show that they are ready.
kubectl get deploy,pod
- Now try to expose the web server again.
kubectl expose deployment/nginx
Then check the service and endpoint information. Take note of the ClusterIP (provided by Calico) in the service information and the Endpoint in the endpoint information to use for later.
kubectl get svc nginx

kubectl get ep nginx
10.96.14.131 192.168.157.133:80
- Determine which node the container is running on. Log into that node and run a
tcpdump(this may need to be installed) to see the traffic ontunl0. While thetcpdumpis still running usecurlto send an HTTP request.
On the cp node:
kubectl describe pod nginx-<specific deployment> | grep Node:
On the node that is running the pod (in my case thw worker node):
sudo tcpdump -i tunl0
Now curl the ClusterIP on port 80 and also try to curl the Endpoint. You should get the same response.
curl <ClusterIP>:80
curl <Endpoint>
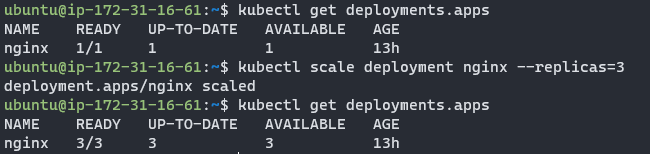
- Now scale the deployment to three web servers.
kubectl get deployment

kubectl scale deployment nginx --replicas=3

kubectl get deployment nginx
- Now look at the endpoints again. There should now be three.
kubectl get ep nginx
Now find the oldest deployment running and delete it so that it is recreated.
kubectl get pod -o wide
kubectl delete pod nginx-<specific deployment>
Then confirm the new pod is running. You should see one that is newer than the other two.
kubectl get po
If you view the endpoints again you will notice the original IP is no longer in use. Try to curl the ClusterIP and any of the Endpoints again. You should still have access to the cluster. Access is only available within the cluster though. Once doe you can stop the tcpdump with ctrl-C.
Lab 3.5 - Access from outside the cluster
Access to the cluster from external sources can be configured using Services with a DNS-addon or environment variables. We'll use environment variables.
- Gt this list of pods and then
execinto on to print the environment variables withprintenv.
kubectl get po

kubectl exec nginx-<specific deployment> -- printenv | grep KUBERNETES
- Find the existing service for
nginxand delete it.
kubectl get svc

kubectl delete svc nginx
- Now create the service again, but this time as type
LoadBalancer.
kubectl expose deployment nginx --type=LoadBalancer

kubectl get svc
Note the EXTERNAL_IP will be pending until a provider responds with a load balancer.
Now on your local machine, in the browser, type the public IP of the node and the port given for the service in the previous step. You should get the nginx welcome page.
Now scale down the replicas to zero and confirm they are all down.
kubectl scale deployment nginx --replicas=0

kubectl get po
Access to the web server should fail now. Scale back up to two replicas and try again, the web server should be working.
- Now delete the deployment to recover the system resources. Note that the service and endpoints need to also be deleted.
kubectl delete deployments nginx

kubectl delete ep nginx

kubectl delete svc nginx
Knowledge check
kubeadmis used to create a cluster and add nodes- The main binary for working with object of a Kubernetes cluster is
kubectl - There can be 1 pod network per cluster
- The
~/.kube/configfile contains endpoints, SSL keys, and contexts.